Father’s Day Craft

IMG_2642

Mike’s Birthday was last week so I decided to attempt a craft with Grace for her to give him. It was definitely more difficult than when she was younger and we made Santa handprint ornaments. She tried eating the paint, rubbing her hands on any piece of furniture  she could see and trying the smudge our project…but we finally got it done and I think it turned out great.

It was so cute when she gave it to him too. He unwrapped the present and she saw what it was and are running over talking mile a minute. She then grabbed the picture from him and walked around the house with the biggest smile on her face. She was so proud and I guess she wasn’t quite ready to gift her project yet đŸ™‚

2015/06/img_2704.jpg

Santa Handprint Ornament

photo 5

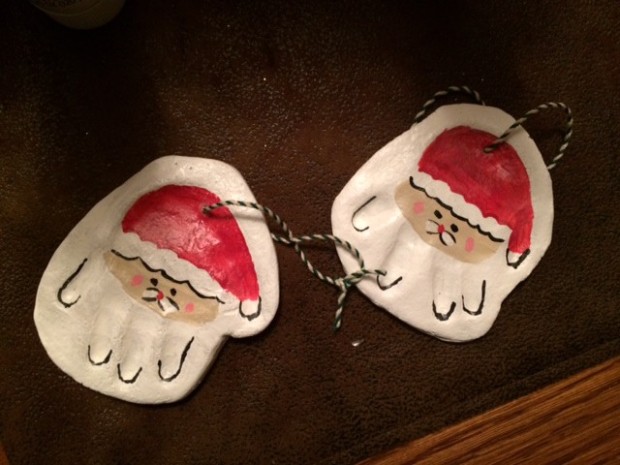
For Christmas this year I made Santa handprint ornaments for family members from Grace. They turned out so cute and there is still time to make one to hang on your tree, after all the epiphany isn’t till January 6th.

To make the salt dough:

1 cup flour

1/2 cup salt

1/2 cup warm water

I mixed the ingredients together in a kitchenaid mixer until it formed a ball

Steps to make ornaments:

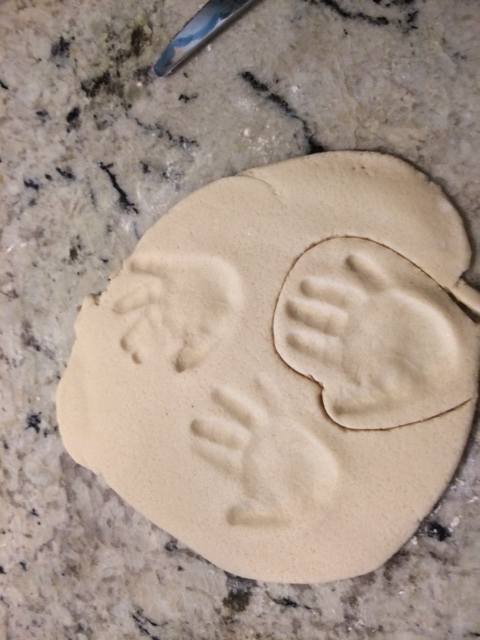
1. Roll out dough, about 1/3 inch thick (make sure it is thick enough so that when you put your babies handprint the part with the impression is not too thin)

2. Cut around each handprint and poke a hole using a pen or I used a skewer stick I had

photo 1

3. Dip your finger in water and smooth out the edges of ornament

4. Place on cookie sheet and bake at 200 degrees for about 3 hours or until dried and hard  (I flipped my ornaments every 30 minutes) – make sure to bake the ornaments on a low heat or the dough will start to rise

5. Once dry I sanded the sides of each ornament to make sure they were smooth – I love these

6. Now you can start painting – I first sprayed the ornament with a clear gloss to make the surface easier to paint – Like this one

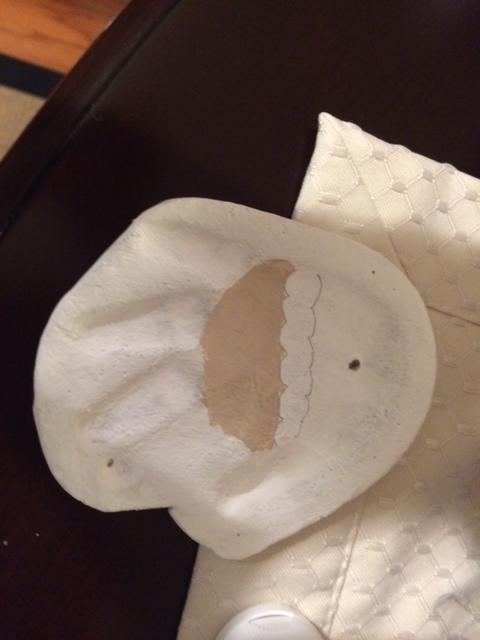
7. Paint the entire ornament white

photo 2

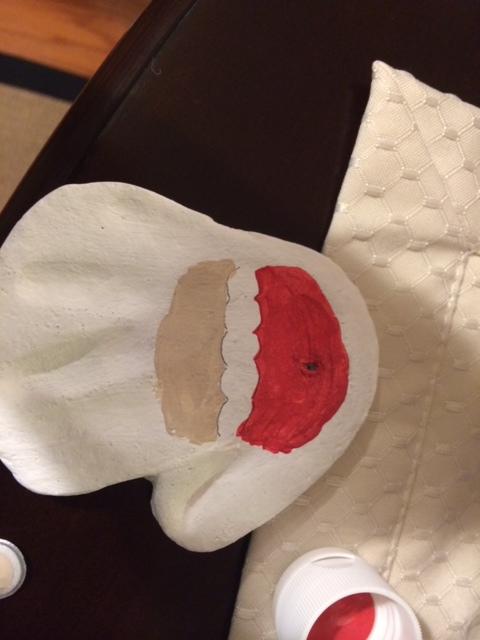
8. Next paint the hat, beard and face on the ornaments

photo 3

photo 4

9. Tie a string through the hole and you have your cute Santa hand print ornament to remember your babies first Christmas (I have been told that these work best for children under 1 because once older their hand print is too large and the ornament becomes too heavy)

photo 5


Since these turned out so well, I am going to try to make some reindeer ones to go with them. Lets see if Grace will cooperate one more time đŸ™‚

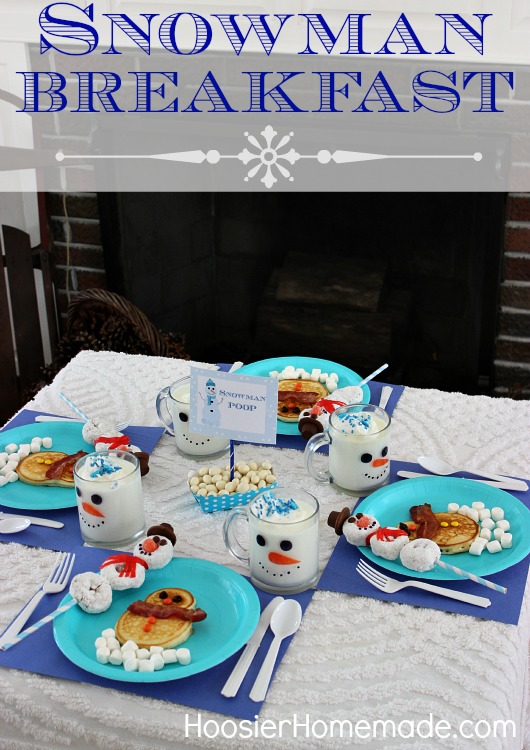
Snowman Breakfast

Snowman-Breakfast.V.words_

Check out this blog for step by step directions to create this winter spread. So cute! The site even has the printable signs for you.

Tips:

Try using chalk markers instead of sharpies, the chalk can be removed so the glasses can be reused!

Supplies:

4 pack of glass mugs

Chalk Markers

Paper Plates

Christmas Activity Placemats– I like these activity placemats to add another activity for children to do

Blue and White Striped Straws

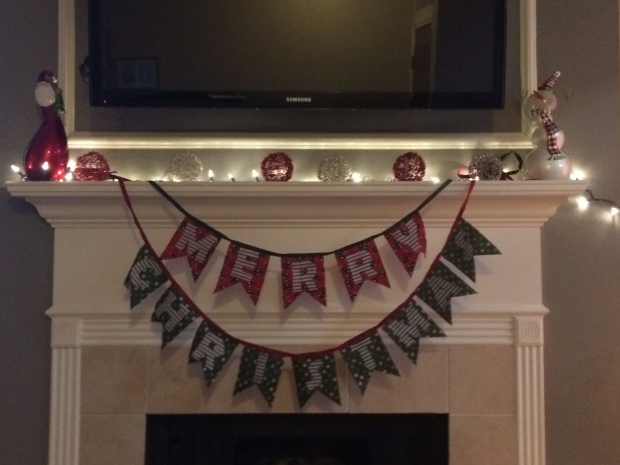
Merry Christmas Fabric Banner

I was so happy for the day after Thanksgiving this year, not only because I was off work but also because we started getting ready for Grace’s FIRST Christmas! I must admit, it was a bit different than what I am use to…since it was 80 degrees and we got our tree from a Home Depot parking lot where they trimmed the tree, put on the tree stand and tied it to your car for you. However, we stepped up our decorations to make up for it đŸ™‚

This year I added a “Merry Christmas” banner. I told you I love these things now!

photo-3

I followed this tutorial for the most part. The two differences…I used a different shape and I added letters to the banner.

I used this template for the flags on the banner. Then to add the letters I created a word document, using word art…I picked a font I liked and a size that would fit on my flag and printed each letter. I cut out the letters and traced them backwards on the back side of my fabric (make sure the letter is backwards so the letter is not backwards when you flip the fabric to right side). After I cut out all the letters I used Fabric Glue to attache the letters to the flags.

DIY Fabric Banners

Photo Taken By Julie Doniero Photography https://juliedonierophotography.squarespace.com

Photo Taken By Julie Doniero Photography https://juliedonierophotography.squarespace.com

IMG_1830

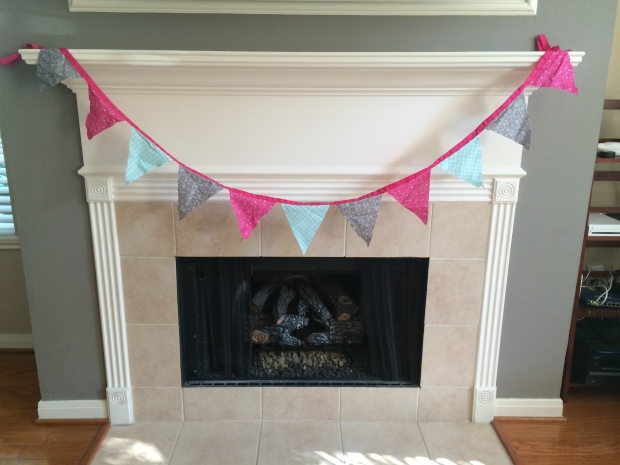
My new obsession…fabric banners!! They are a perfect for party decorations. I made this one to hold in the background of Grace’s pictures. It was so easy to make and I used the scrap fabric left over from her Rag Quilt.

What you need:

Ribbon
Sewing Machine– I love this one
Thread that matches ribbon
Fabric – I used about 1/3 yard of three different fabrics
This Template


Steps:

1. First decide what size you would like to make your pendants from the above template – I made mine in between the 6″ and 7.75″ mark on this template because I was using scrap fabric

2. Then decide how many pendants you need to cover your distance – I have a total of 11 pendants

3. Now take your ribbon and fold it in half and pin the ribbon in place creating a “ribbon tail” (see picture below) that will allow  secure your banner into place


PicMonkey Collage

4. Once you are done with your “ribbon tail”, start adding your pendants in. Put the edge of your pendant into the crease of your ribbon and pin into place. I laid down the next pendant so that the two corners were touching to make sure the pendants were evenly spaced.

5. The make an identical “ribbon tail” on the other side of the pendants.

6. Now you just need to sew at the base of the ribbon to hold the pendants in place.


You could always stencil or apply letters and/or decorations on to the pendant to take it up a notch đŸ™‚

DIY Gel Staining

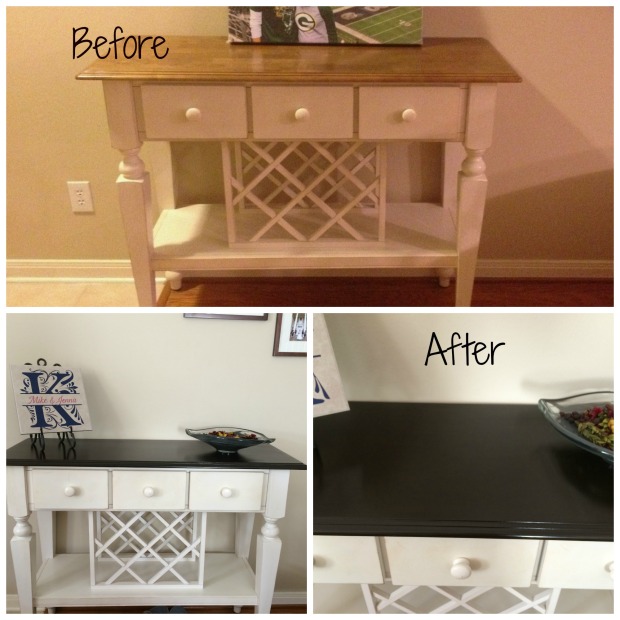
I recently found this lovely table for our entry way…one problem…the wood top did not match the rest of our furniture. It was a very light wood while all the rest is dark. I remembered hearing about a gel stain that was “fool proof” but I was always  too nervous about ruining my items to try the product. I finally got over my fear and went for it.


What you will need:

1. Java Gel Stain

2. Poly Semi-Gloss Top Coat

3. Sanding Wedge

4. Foam Brushes or an old sock


Steps:

1. First sand the surface that you will be staining – just needs to be a rough sand

2. Apply the gel stain with either a foam brush or a sock – apply a LIGHT coat and let dry COMPLETELY! (I let it dry overnight) **Warning first coat does not look that great but trust me it will look better!

3. Repeat step 2 with 2 more coats letting it completely dry in between

4. After you applied 3 coats of stain finish with the poly top coat – again let completely dry


Gel Stain

It was way easier than I thought and I am VERY happy with the results!

DIY Baby Wipes

When I took an infant care class at our hospital, it recommended using wipes with just water. I read a few other books that mentioned that commercial wipes can be a little harsh for a baby’s delicate skin so I decided to look into making my own wipes.

It turns out making wipes is very easy. I have tried quite a few different wipe recipes over the past few months and this is my favorite.

What you will need:

Cheap wash cloths – thin cheap ones work the best – like these

Tea Tree  essential oil – antimicrobial properties

Lavender essential oil – relaxation, antiseptic and pain reliever

Coconut Oil – moisturizing

Witch Hazel – soothing

Wipe Warmer – I have this one

Steps:

1. I boil about 4 cups of water in a sauce pan

2. I add about 5 drops of tea tree, lavender and witch hazel to the boiling water and then 1 tablespoon of coconut oil

3. I then soak the wash clothes in the mixture and let them cool

4. Once cool squeeze out the excess liquid

5. Fold them and put in a wipe warmer  and you are all set to go!


My daughter has used these since birth and she had only had diaper rash twice – when we were gone and using regular wipe. These have worked out very well for us.

DIY Rag Quilt

Grace using the Rag Quilt during her photos Photos by http://juliedonierophotography.squarespace.com

I recently saw baby pictures with rag quilts being used as props. I had just scheduled my daughter’s 6 month photo shoot and I wanted to included the blanket. Unfortunately, the person shut down their Etsy shop to catch up on orders đŸ˜¦  so I decided  to make my own.

I first needed to buy a sewing machine. I had no idea how this project would turn out, so I did not want to spend much on this machine. I did a bit of research and found this sewing machine on Amazon. It ended up working perfectly and I liked it better than any other machine I have used.

A lot of the quilts online are for photo props were 3×3 squares and being used by newborns. Since Grace was 6 months I went with 4 squares x 4 squares pattern and used larger squares (9 in x 9 in).

Steps:

1. Cutting out the fabric – I used 9×9 inch squares and sewed  a 1 inch seam — my final blanket was 30 inches x 30 inches. For each quilt square I cut  2 squares with the fabric I picked out and 1 square of a flannel fabric (which you will not see). I have heard that flannel works well for the the “ragged” part but I could not find any flannel fabric I like so I went with flannel in the middle instead.

2. I then assembled the 9×9 square “sandwiches” and pinned them. The decorative fabric of your choice should be used as the outside of the sandwich with the “good side” facing out and the flannel on the inside.

3. Then drew a line from corner to corner and sewed an “X” across the square – I used the same thread for each of the squares  instead of matching it to the fabric.

4. Once all 16 squares have been quilted with the “X” you can begin to assemble the quilt – I laid out all of my squares to make sure I like the pattern ahead of time. When you line up your squares to sew them together make sure you have the “good side” facing out for each one, so the seam will be visible on your blanket. Continue sewing your squares together until you have all four sewn together to make a row.

photo 2

5. When you have all 4 rows complete, you sew each row together again making sure the “good side” is facing out. Here is an example of my rows:

photo 3

6. After I sewed all my rows together I realized I didn’t like having all of the seams as the back of my blanket (even though I originally was only going to use this for a photo prop) – I LOVE soft, cuddly blankets, so I decide to get a flannel piece of fabric and sew it to the back of my rag quilt. To do this I cut the flannel fabric to match the size of the quilt and pinned it in place. I then sewed a 1 inch seam all around the edge of the blanket to attach the flannel.

7. Now you are ready to cut (my least favorite part, but you are almost done!). Cut each of the seams, I did about every 1/2 inch. I recommend having at least a fabric scissors for this. I started with a regular scissors and I regret it and so does my hand. I switched to a fabric scissors and it was much better. Just make sure you DO NOT cut the stitches!

8. Once all seams are cut you are ready to wash and dry your quilt so it frays and has the vintage look.

photo 4